Image to Relief coming in flat
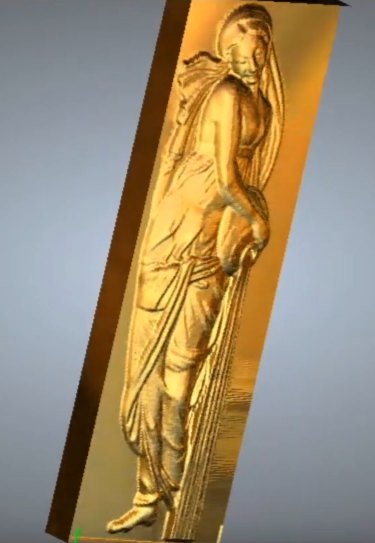
Trying to make a series of Religious charms using the image to relief function. I edit the image in CorelDraw to be cropped how I need and to be in grey scale. Imported the relief into Carveco and keep getting a "flat" result. I've watched many of the tutorial videos and they seem to just work when they import image with a nice "curved" dome like elevation to the relief. I've tried multiple different image formats and inverting the image and adjusting the contrast, brightness and dpi settings. Every result is the same, looks good from the straight on view but side view is just flat with a uniform flatness to the relief regardless of the Z plane height entered. Please see images. I also added an image from a video that shows the result I am hoping to achieve. Appreciate any help. Thanks

Comments
Zack,
This hard (don't want to burst anyone's bubble) everything I have done to create shapes I have used the 2 rail sweep, the shape editor, extrude, spin and sculpting, once in a great while I have imported a picture and I have received the shape I was after.
I know there are a slew of YouTube videos out there guaranteeing 3d shapes from their stuff, having done the work in artcam (now carveco) for the last 20 or so years I find it hard to believe their statements (not saying it cannot be done, it's the fact I have a hard time believing it, I would need to see what videos of carvco doing this) what I think you are seeing is someones work being brought in that already has the rounded shape done to it.
Tell you what I'll get you a picture you can bring in, I will also give you what I did in an art file so you can see the difference between the two, if this would help.
There are many beautiful religious paintings and sculptures that I would love to have, but for someone like me it would take a long time modeling to get what I liked in just one. If you don't mind could you give the link for the video so I could watch.
ps. I don't do much video watching, those of which Leighton has done are fantastic, I instead go to focus on what I need to get done (there is a good chance that I may be missing something).
mike
Also I wanted to point out that Photo Shop I believe is the only program that I know of that can really give a good gray scale image I don't think CorelDraw can really do that, in truth I have photo shop but don't use it to justify what it cost me, I don't have corel. Some how it has to give a "Z" height in the gray.
mike
Hello Zack,
Unfortunately, not any grayscale image works perfectly with Carveco..
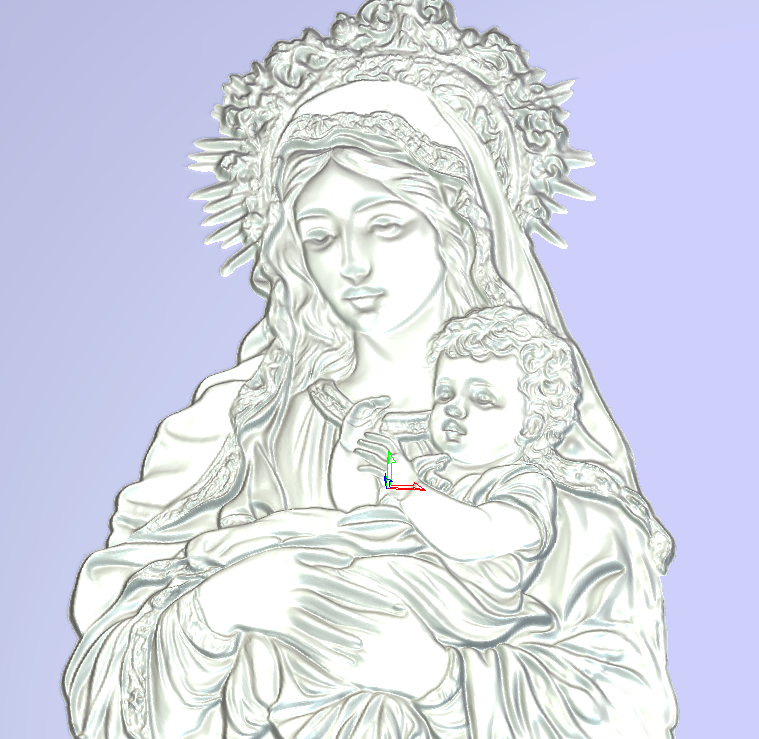
The image you turned into grayscale will not work properly, because the 'grays' refer to the shadows and not the depth. If you see the screenshot below, you'll see the red marks (whitest areas = highest result) are the baby's clothes which should be lower than the green marks (arms and hands) that normally should be higher than the clothes, but to to gray color the result will be lower. Similarly, baby's clothes seem to have the same depth as Mary's arm/sleeve (blue mark) which due to the dark grays will result to a much lower depth...
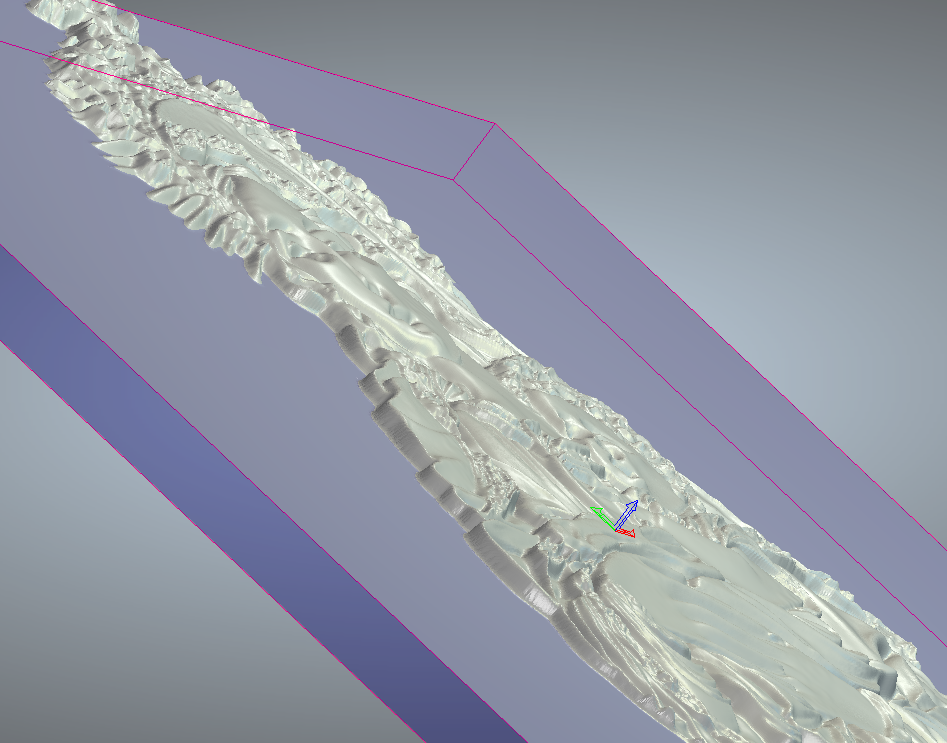
If you Google for 'grayscale height map images' or 'grayscale relief bitmap', 'grayscale images for artcam' (or anything similar) you will get plenty of images. There you'll notice the difference and how the proper grayscale image should look. Here is an example:
In other words, the best for the image you need, is to be modeled from scratch, in order to get the best outcome. It is a hard task, I know.. this is what I do! A quite simpler method is to create the relief as you did, but just a bit so you get the basic base to work on. Then add/subtract parts and shapes to get a better result.. but again it won't be perfect.
Hope all makes sense!
Elina.
Elina,
Thanks for being eloquent. I know what I need to do in Carveco, mainly because that is the only thing I concentrate on, your view point was spot on.
Again thank you.
mike
Hi Michael,
Thank you for your comment.. I admire your knowledge on the software, so it's my pleasure to receive this positive feedback from you :)
Elina.
Things are starting to change, we now have AI 🤨,
https://github.com/MackinationsAi/Upgraded-Depth-Anything-V2/
probably in future versions, Carveco will include something like this.
I used this software two days ago for a project, and it did half the work in a minute.
Use only photographs; it doesn't understand illustrations or graphics.
Dan,
Is this a program that you install on your computer or is it one of those things you have to be online?
mike
Michael, is offline,
There are clear instructions on how to install it, so it is a locally installed program
the project, a 50mm commemorative coin
Dan,
What kind of cleanup did you have to do? Were there much in the way of abnormality's that needed sculpting or some kind of corrections? The detail you get (for me anyway needs to be real sharp, if not then it would be better for me just to model it, to get what I want.
I've never looked at that one but I've seen and tried a few that were worse than anything you could imagine.
Thanks
mike
It wasn't a cleanup; I corrected the facial anatomy (height on the Z axis) and deepened the details of the clothing and flag over hours of modeling. It looks sharp because it was done at a resolution of slightly more than 4000px.
It was an unusual job that had to be done quickly and was mostly an obligation for someone, so I did a test with the AI. In this case, it seemed faster to correct the relief than to model it from scratch.
From what I've tested so far, if the photo is good and the volume of the relief is well perceived (in a sculptural sense), the results are somewhat decent for someone working in high relief (wood or stone). However, for low relief like that on a coin, it's not effective.
Dan
"I've never looked at that one but I've seen and tried a few that were worse than anything you could imagine."
yes, is true what you say but this AI model is different
Thanks Dan,
It is integrating viewing what the possibilities of AI might become, I watched a few videos yesterday, they only showed the positives and very few negatives, to me that's a problem. I wasn't sure what the export formats of any of them are (probably missed it somewhere, too focused on the full picture), some of what I watched looked like I would have to install another program (kind of frustrating, I would have to spend time learning that too).
Well, again thanks for the info and the push to look further into this.
Mike
Got a few pictures of beards, and Santa's the last few weeks, the man wanted me to model one so he could have his daughter hang it. I did the beards first (they came out ok (?) sent him pics of them, told him I wasn't pleased but I did have fun sculpting. He gave me one more pic brought it into Carveco, did all the work, the man was very happy, now have to cut it out to make sure everything's right. Here's what was done can't wait to see how it is in wood.
mike
Hi,
The discussion about AI is too broad; we only talked about an AI model that converts a photo as much as it can into 16 bits grayscale.
The program automatically exports in PNG format; you don't have other options unless you modify the code.
If I remember correctly, I had to manually install Triton; read all the installation instructions, compared to others this is not a difficult installation.
Dan,
I definitely thank you for the pointing to and the instructions. I've read a lot on these since you mentioned it.
I probably have more to read and look at, from what I've read and watched it does definitely look like it would benefit Carveco users a lot if it became a part of it.
New software is always a challenge for me.
Again
Thank you.
mike
Please sign in to leave a comment.