Answered
Help Required: Nesting and paneling
Hi All,
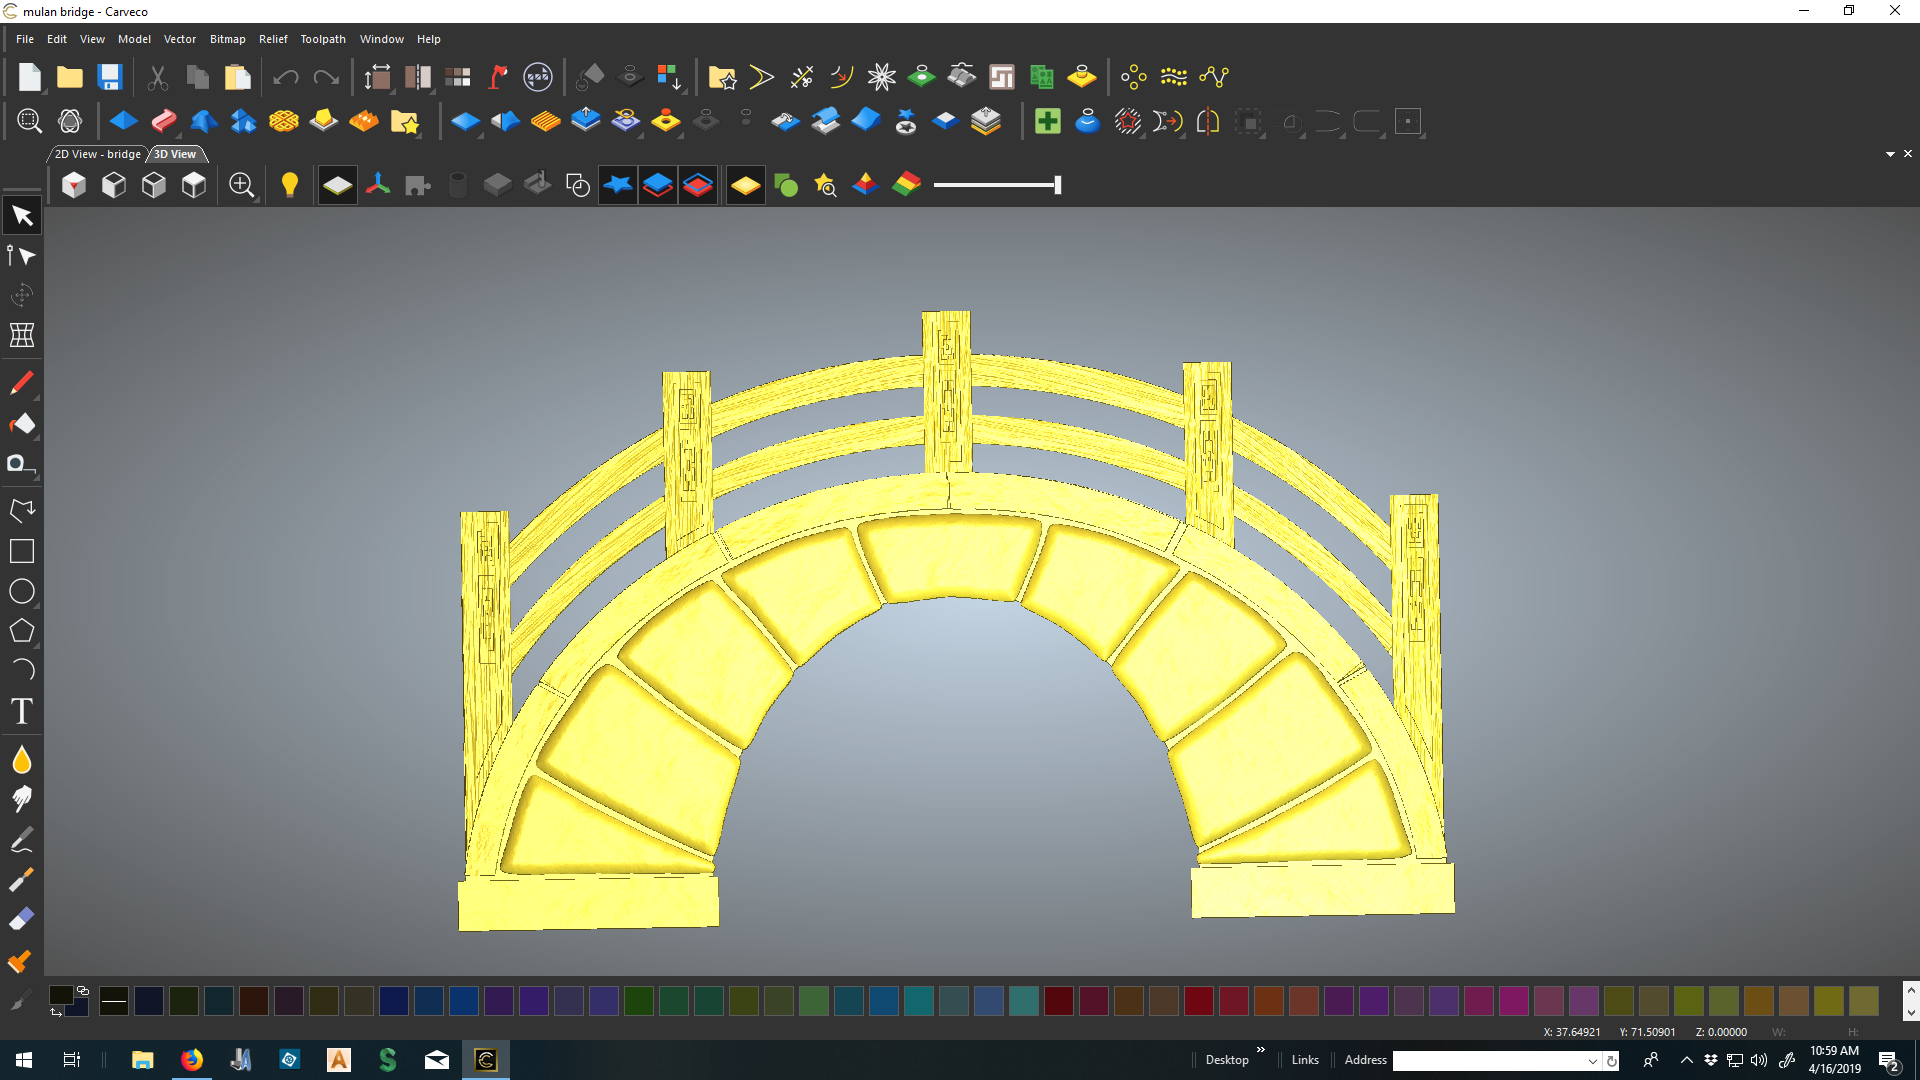
I am making a prop for my daughters school play out of 2" foam board. My model (see screenshot below) is approximately 60" height and 94" width. My machine bed is 24" x 96", so I have to cut up my model into vertical sections. For efficient use of material, if I nest two sections by flipping opposite sides I can get two pieces of the model out of a 24" x 96' piece of foam board. I haven't used the Panel Toolpaths functionality much and I am not sure if I can nest the pieces as I've described above. Would this work, or is there a better way? My experience to date is with ArtCAM Insignia and ArtCAM Standard. I know that Carveco is similar to the Pro/Premium version - a lot that I am not familiar with yet.
Thanks for your interest,
Bill
Comments
Hi Bill,
You could use the Panel Toolpaths tool, but the problem you will face is that you cannot optimize afterwards, and will use more material than you would like.
Shown below is a quick example relief I have created:
Create a Machine Relief toolpath over this relief:
When done, select the Panel Toolpaths option. Here, specify the dimensions that you require; in your case, 24" x 96". This creates four separate panels:
The limitation that you have when using the Panel Toolpaths tool is that when you click Save Paneled Toolpaths, you are taken straight to the Save Toolpaths dialog to save your NC code. Therefore, you cannot nest.
An alternative option would be to create 24" x 96" rectangular vector boxes around the model area which represent each of your sections, as shown below:
Afterwards, select one of the rectangles, then use the Relief Cookie Cutter tool:
Doing so converts the area inside the vector boundary into a floating piece of relief clipart, which is shown as blue in the view:
Repeat this process with each of the remaining rectangular vectors:
Now, you can click and drag each of these pieces of floating clipart and move them around into your preferred positions. Below, I've moved them to the first 24" x 96" block:
Select the two pieces of clipart you want to paste to the model, then press the Return key to combine them with the relief. You can then machine them using a Machine Relief toolpath:
Save the relief and then reset it, or create a new relief layer and toggle the visibility of the original relief layer off. Repeat this process for each of the remaining pieces of floating relief clipart.
I hope this at least gives you a few ideas, Bill.
Thanks ever so much for sharing your suggestions with Bill and the rest of the community, Leighton. These are precisely the type of customer interactions we love to see.
Hi Leighton,
Thanks for your response and suggestions. Your second option is very similar to a way I have done this before. I like your work flow better; before, I had saved the model to clipart then brought it back in and sliced it up. Your way is cleaner. I am not real familiar yet with Carveco and other options that may be available in term of tools and functions.
Thanks again,
Bill
Not a problem, Bill. Glad to have offered some help. Hope it goes well and please post some pics in the Gallery.
Nicely done, Leighton.
To me, Panel Toolpaths works well in certain scenarios but due to the lack of control I mostly take a different direction for 3D models. For example, this is one I completed a month or so ago.
The project was 120" x 120" x 12" and cut in 4 layers of 3" xps, where each layer was rotated 90° to the one above/below.
It then had to be completed in 4 pieces at 60" x 60" as the xps is 4'x8' and both my machines are 4'x8' beds. I completed the full model then applied vector rectangles and moved the origin to the center of each rectangle for toolpathing. I precut the xps to sizes needed and machined, the 90° rotation I took care of with my control software.
Not as elaborate as Leighton's panel toolpathing but quick and easy.
Gary
That looks great, Gary! Was it for an art installation, or something? I’m sure there are countless ways to do it without even going near the Panel Toolpaths tool.
Yes, Leighton. It was an art piece for a museum. For the finish, it was coated with high impact epoxy and shipped. The customer is doing the final texture and paint finish.
Hi Leighton
Here is a picture, I decided to split it up horizontally in the end. Now I'll let the kids have at it
Bill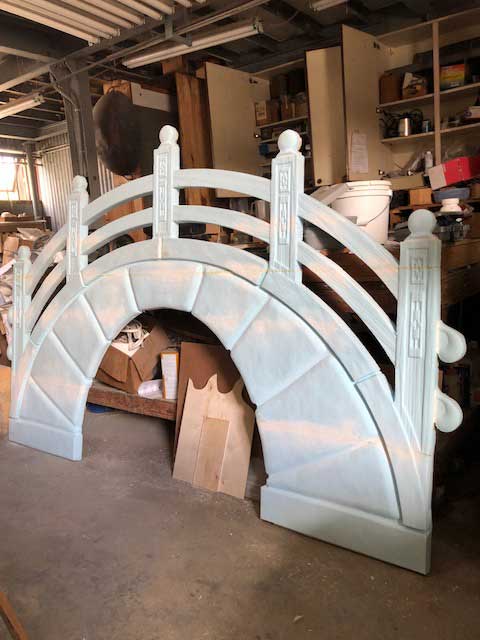
Great looking prop there Bill, I'll bet your daughter and school are tickled pink. ( or at least blue)
Gary
That's brilliant Bill! Good work.
Remember to tell everyone that you hand carved it and it took months to make :)
Well done! That turned out great.
Please sign in to leave a comment.