Vectors to Follow Relief
I am working on a project and have a wavy flag relief. I was to do the stars as a v-carve in the wavy union area of the flag. How do I get the vectors to follow the contours of the relief.
I am working on a project and have a wavy flag relief. I was to do the stars as a v-carve in the wavy union area of the flag. How do I get the vectors to follow the contours of the relief.
Comments
Hate to ask, Which version are you working in?
Are working with a picture right now and you want the flag lines, vectors to follow the couture of an image in that picture?
There are videos that Leighton has on YouTube that you would benefit from, he does a fantastic job of walking you through a bunch of stuff.
mike
I'm sorry, I just reread your request.
When you bring in a relief the thing is blue, there are 2 areas that you can chose things to change your file one is "transform options", the other one that has a star it's the "Relief clipart past options" click on that one, one of the check boxes has "Past outline vector" click that hummer you should be getting a vector around your relief
mike
Picture is worth a thousand words.
mike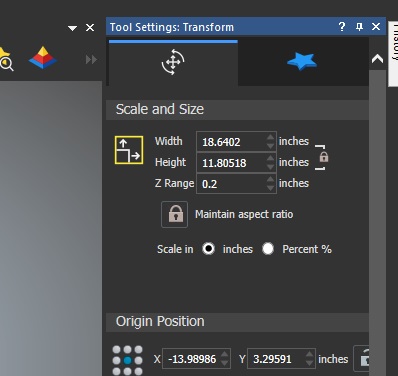
Hi Mark Johnson,
In case you have the relief ready (and not in a clipart 'blue' state), you can try using the Create Boundary from Relief tool. This allows you to create vectors either around the relief (outline) or you can set a min and max height so the vectors created will mark areas on that heights/depths.
Of course that would work better if your relief was 'flat', in your case the stars should all be at the same height level. Since your relief is wavy, as you mentioned, then the best solution is to draw the vectors yourself from scratch (always from the Top View!).
Regarding the V-carving process, I'm afraid I cannot advise as I'm only a designer, not a manufacturer :)
Hope that helps. If you're still facing issues then please share a screenshot to better understand the situation.
Elina.
OK sorry for the delay as i have been working and have not had a chance to try any of this. I will lay down the relief and resize it to the size of flag i want which is 16x30. so now the flag body is set. Now I want to add the star vector to where it follows the contour for the union portion of the flag. that is what i seem to not be able to do properly. For some reason mine is not working right. So do you know of any youtube videos or step by step directions that are out there. I really want this to work and do not want to give up or do just another flat flag. plus this way i will know how to add graphics to the strip portion of the flag.
sorry i am just using carveco maker not the upgraded versions.
Mark,
I use Carveco Pro, I had to find a way to view maker, well good new I found a way.
The stars, crap they are going to be all contorted, HUH? Well there is a way not to say a lot of words doing this first you have a shortcut (I'll place an image) that will give you stars but you'll probably need to use node editing to move the points around, or a way to contort them to fit what you want (I'll give you a pic of this too), thing is you'll more than likely tweak the view of your flag every way around (betting, and for a change I'd win) I'll give you another photo showing what button to push to get your view straight up and down so can put your stars where you want them, or at least close, you might try to make the stars a little bigger so the v-cutter will clean them up.
mike
Ps let me know if this does it for you.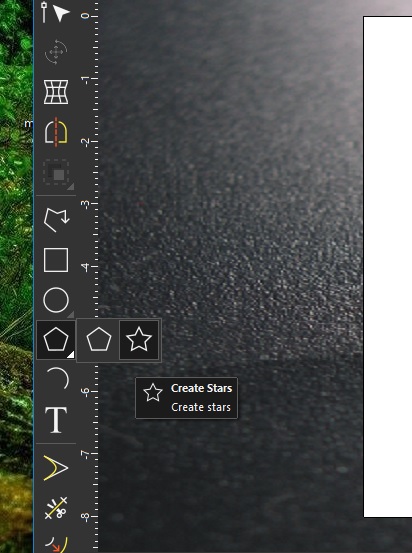
Hi Mark Johnson. One important thing you need to keep in mind (in case it's not clear already) is that we are able to draw only 2D vectors, and not 3D. Meaning that your star vectors will never follow the depths and heights of the flag, on the Zaxis. Which brings us to what Mike and me are saying, that the vectors will need to be drawn from the Top View (X and Y axes) following the stars as shown from that view. You can use either Mike's way: draw the stars and then edit the nodes (Node Editing or/and Envelope Distortion), or use the Polyline tool to draw them from scratch.
Hope that helps!
Elina.
Mark,
Like I said I work in the pro, learning maker is, well, difficult to say the least, but it can be worked, like cutting circles on a table saw (not the best way but it can be done)
You said you have a file, one of 2 ways to do this, one ask one of us who have and use the Pro or struggle, another way which doesn't use the imported file, make your own.
Hear me out on this, you can do it.
I brought the JPG into maker (a bazillon colors) made it a size of 39 by 22
Then I imported it into maker gave it a height of about 1 inch, gave me rises that were rather nice, next I went to the 2d view I could draw vectors easily.
Maybe you could do a screen shot of your 3d view so you could do the picture color routine if you can get it the same size.
3 pics for you 2 in maker of what I am talking about and the third one is of the benefit of working in the pro, of which there are too many to list the view I am giving is the 2d view of an imported image that I can vie to draw vectors it has a height of .1", which is my standard for importing vectors, I am hoping you understand I am not wanting to "T"- you off, like I said you can do circles on a table saw but at a cost, a scarrrrrrry one.
mike
ps maybe you could do a bitmap to vector, (don't know what you can do in maker very much)
Mark,
There is another option, You could or rather you should check out maker plus, it has the shape editor, and a few others that are really a great benefit in making undulation and giving fantastic shapes to a project there is also some sculpting tools these also give a great help in giving shape to a model.
In the flag I showed you could make it look like it's waving real easy, by the way I got vectors by using the bitmap to vector tool I just used different colors as primary color, it gave all the vectors that would be need to v-grove the stars.
mike
Please sign in to leave a comment.