Answered
model/ create triangle mesh/ copy to clipboard
Hi everyone trying to figure something out I am in model because I am doing a photo to stl. I wanted to ad to assembly the way I do in projects but there is only save (stl) or copy to clipboard. is clipboard something like assembly and where do I find the parts list. I have searched help and Carveco video lists.
or is there a way to open a photo in projects
Evonne
Comments
Hi Evonne Sawyer,
Please confirm what type of model you're currently working in as part of your project. For example, 3-Axis Flat Blank.
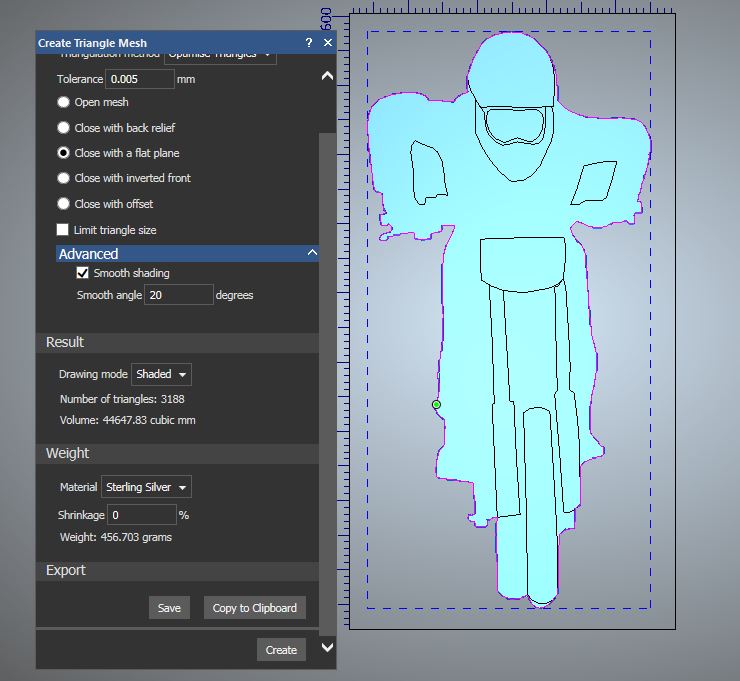
After creating a mesh from your relief, you should find the Add to Assembly button in the Create Triangle Mesh panel's Assembly settings, which is directly above the Export settings which include the Save and Copy to Clipboard buttons you've already described, as shown below:
The clipboard in Carveco works in much the same way as the Windows clipboard; you cut or copy objects to the clipboard, and them paste them elsewhere. If you click the Create Triangle Mesh panel's Copy to Clipboard button, then right-click the Project tree's Assembly item and select the Paste context menu option, your mesh is pasted into the Project tree.
You cannot import an image into the Project tree; it must be imported into a model.
Thanks for your time and consideration.
There is no assembly in project tree in models. carveco\models\bike luise. I need to be able to save separate parts. Should I use export .rlf like I used to do on my old artcam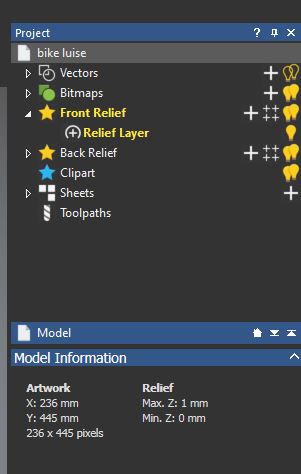

Hi Evonne Sawyer,
The Assembly item is a default part of the Project tree whenever you create or open a project within Carveco software.
Your screenshots show that you've opened a Carveco Model file named bike luise.art from the Recent Files list. This means you have neither created nor opened a project, which explains why the Assembly item is not part of the Project tree. A Carveco Project file would always be listed in the Recent Files list with the .3dp extension.
Please try creating a new project using the Start page's New Project option, right-clicking the Project tree's Models item, selecting the Import context menu option to display the Import Model dialog, choosing your bike luise.art file, and then clicking Open. Once your model is part of the project, open the model by double-clicking its name in the Project tree, and then create a triangle mesh just as you've done before. After doing so, confirm whether the Create Triangle Mesh panel's Add to Project button is available to you.
Thanks for your time and consideration.
Ok maybe you are not understanding or I am missing something. I am creating a piece from a photo which means working in models NOT projects. ( I use assembly in projects all the time) I need to be able to save parts of the photo separately in models as in the arms hands, front wheel and handlebars separately so I can use photo layer on top. Like when one does a face.
Do I save the models\ parts as separate front reliefs or is there another choice for saving parts like in projects assembly.
If you only have an imported image in your model, and want to create a separate relief for the different elements of the image, you would work with multiple relief layers. Each element of your overall design can be created on a new, separate relief layer, you just need to be careful to ensure the correct relief layer is active when you're creating a relief; the name of the active relief layer in the Project tree is emphasized in bold yellow text.
If you want to create separate reliefs from an existing composite relief within a single model, you should find that the Relief Cookie Cutter tool meets your requirements. Please watch the following demonstration video: Relief Cookie Cutter
While using the Relief Cookie Cutter tool, you can paste a floating cut piece to a new relief layer. You can then save each of the separate relief layers as a Carveco Relief file (*.rlf).
Please note that this demonstration video was captured in Carveco Maker+, which does not include relief layers, and so does not show how you can paste different pieces of floating relief clipart to separate relief layers.
You can still work with multiple models within a project, and doing so yields the ability to add different triangle meshes to the Project tree's Assembly.
Thanks for your time and consideration.
Thank you very much as we posted back and forth I was experimenting I believe .rlf is my answer. Create the parts save them a rlf files and import to component parts.
Hugggsssss
Evonne, you might want to re-read the last post by support. Their suggestion will probably be better as you will keep all of your components in place and in 1 file. The way you are describing will work but you will have to keep track of many more files. Just a thought.
Please sign in to leave a comment.